渣渣的我自从搬瓦工跪了之后,就没有能用的(开飞机的)服务器了,一直听闻 Google Cloud Platform 超级强大,而且首年赠送三百刀额度。所以,说干就干,开始薅羊毛。当然使用 GCP 之前首先要科学上网,即刻开启小飞机,访问 https://cloud.google.com/ 就可以开始薅羊毛之旅。
温馨提示,这是一篇入门水文没有任何干货,只是用于记录自己的部署过程,以避免后期忘记。(求轻喷)
前言
本文记录了笔者在学习 GCP 过程中踩到的坑,由于不同云服务商的具体功能不一样,所以初次接触的我还是踩了不少坑。本文将简单介绍 GCP 的常用功能和一些开发环境的部署:
- 了解 Google Cloud Platform 的项目(Project)、 VM 实例(VM instances)、防火墙规则(Firewall rules),并创建一个 VM 实例。
- 部署 Golang 开发环境。
- 部署 Nodejs 开发环境。
- 部署 Nginx 环境。
- 部署 Git 环境。
- 部署 MySQL 环境。
创建 VM 实例
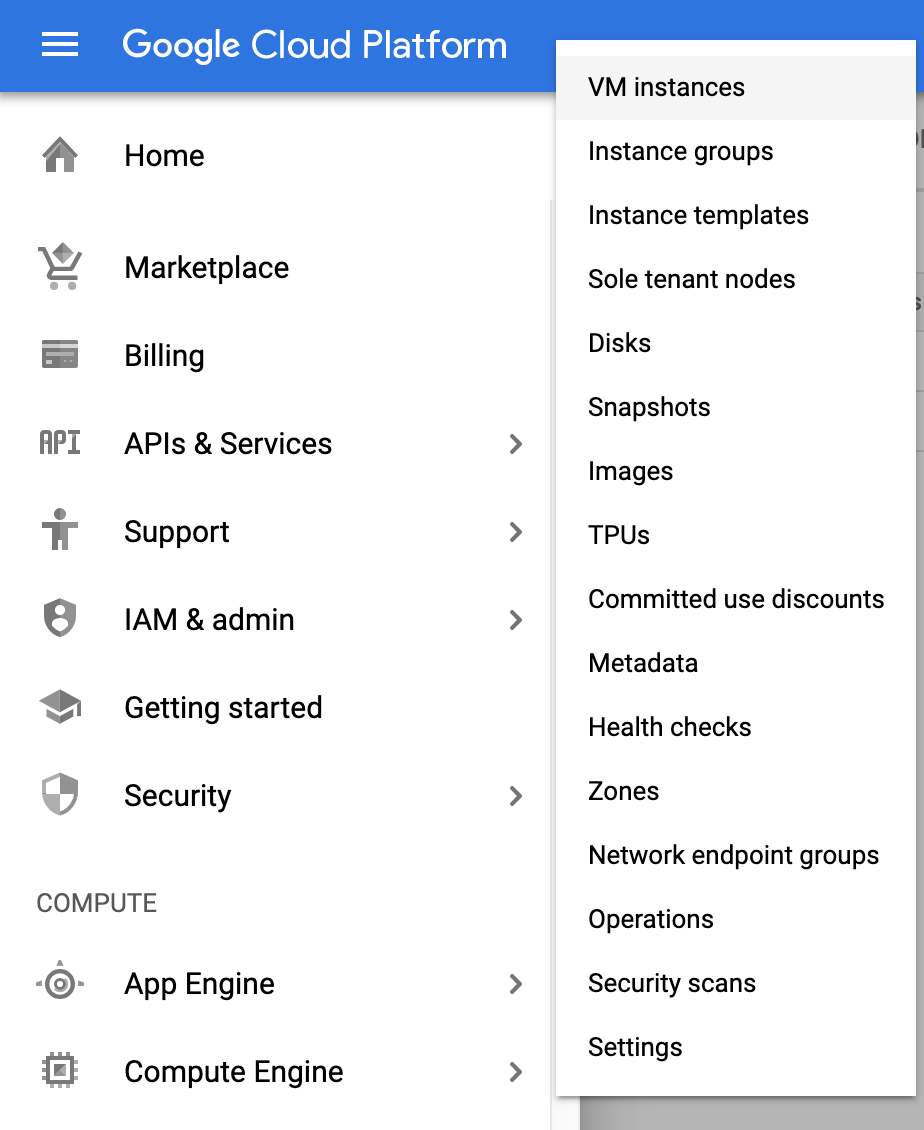
- 点击左侧菜单栏选择 Compute Engine 项目,选择 VM Instance。
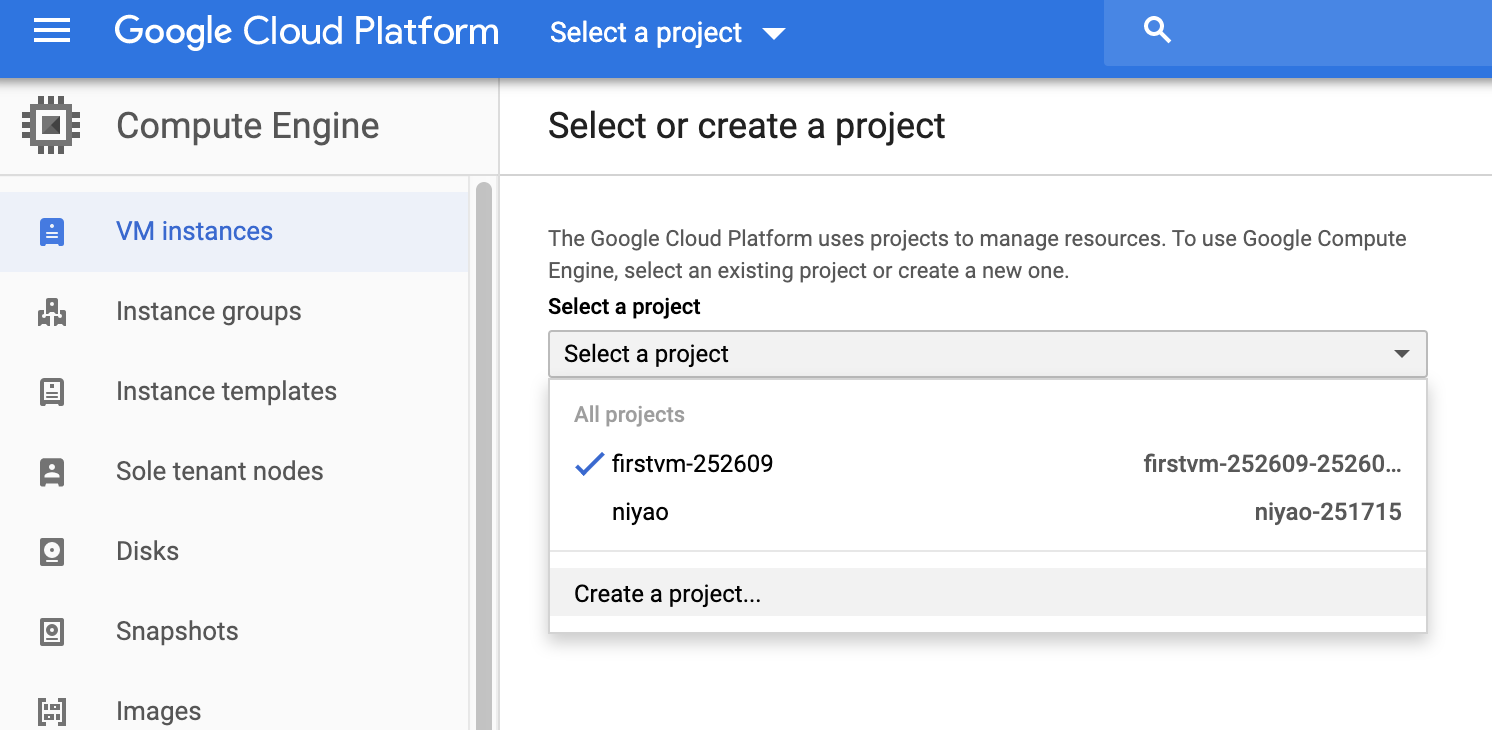
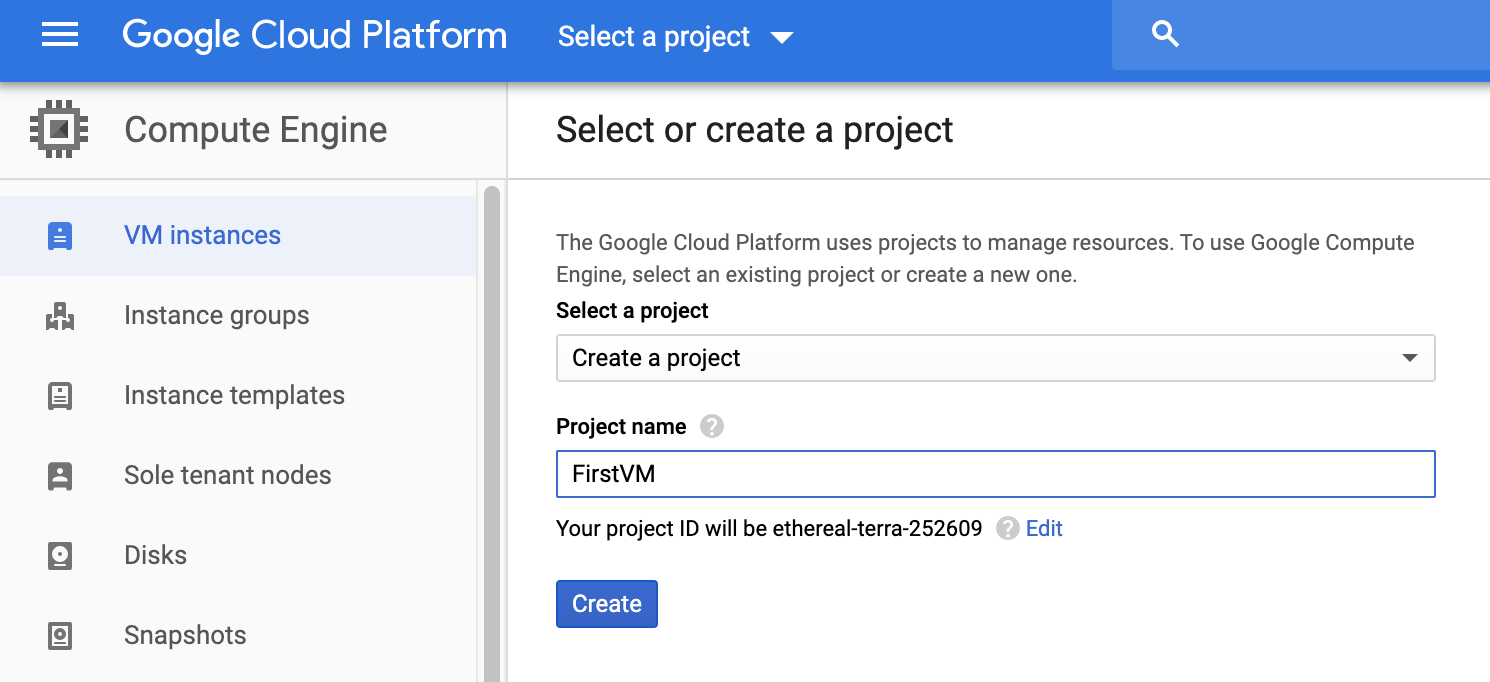
- 创建 GCP VM 实例之前必须先创建一个项目 Project ,Project 的名字随意,这里我命名为“FirstVM”,接着点“Create”。
-
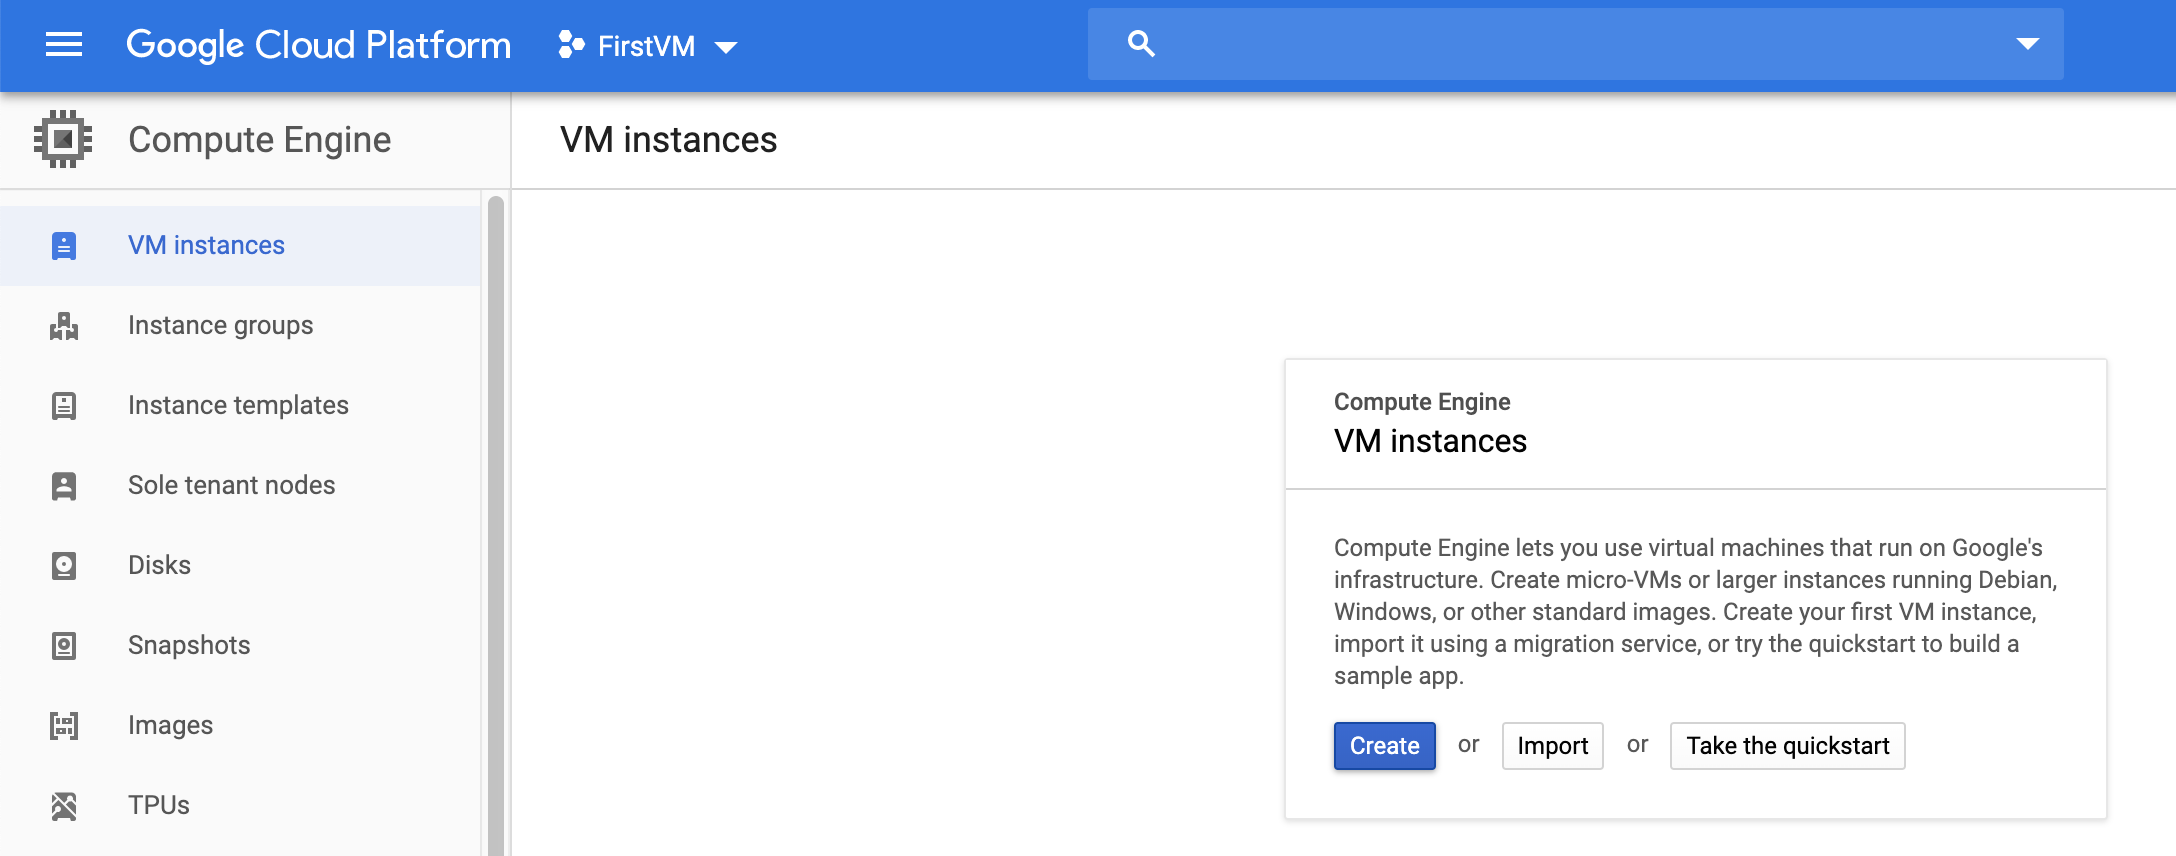
点击 VM Instance 卡片中的 Create 按钮,进入初始化 VM 的页面。
-
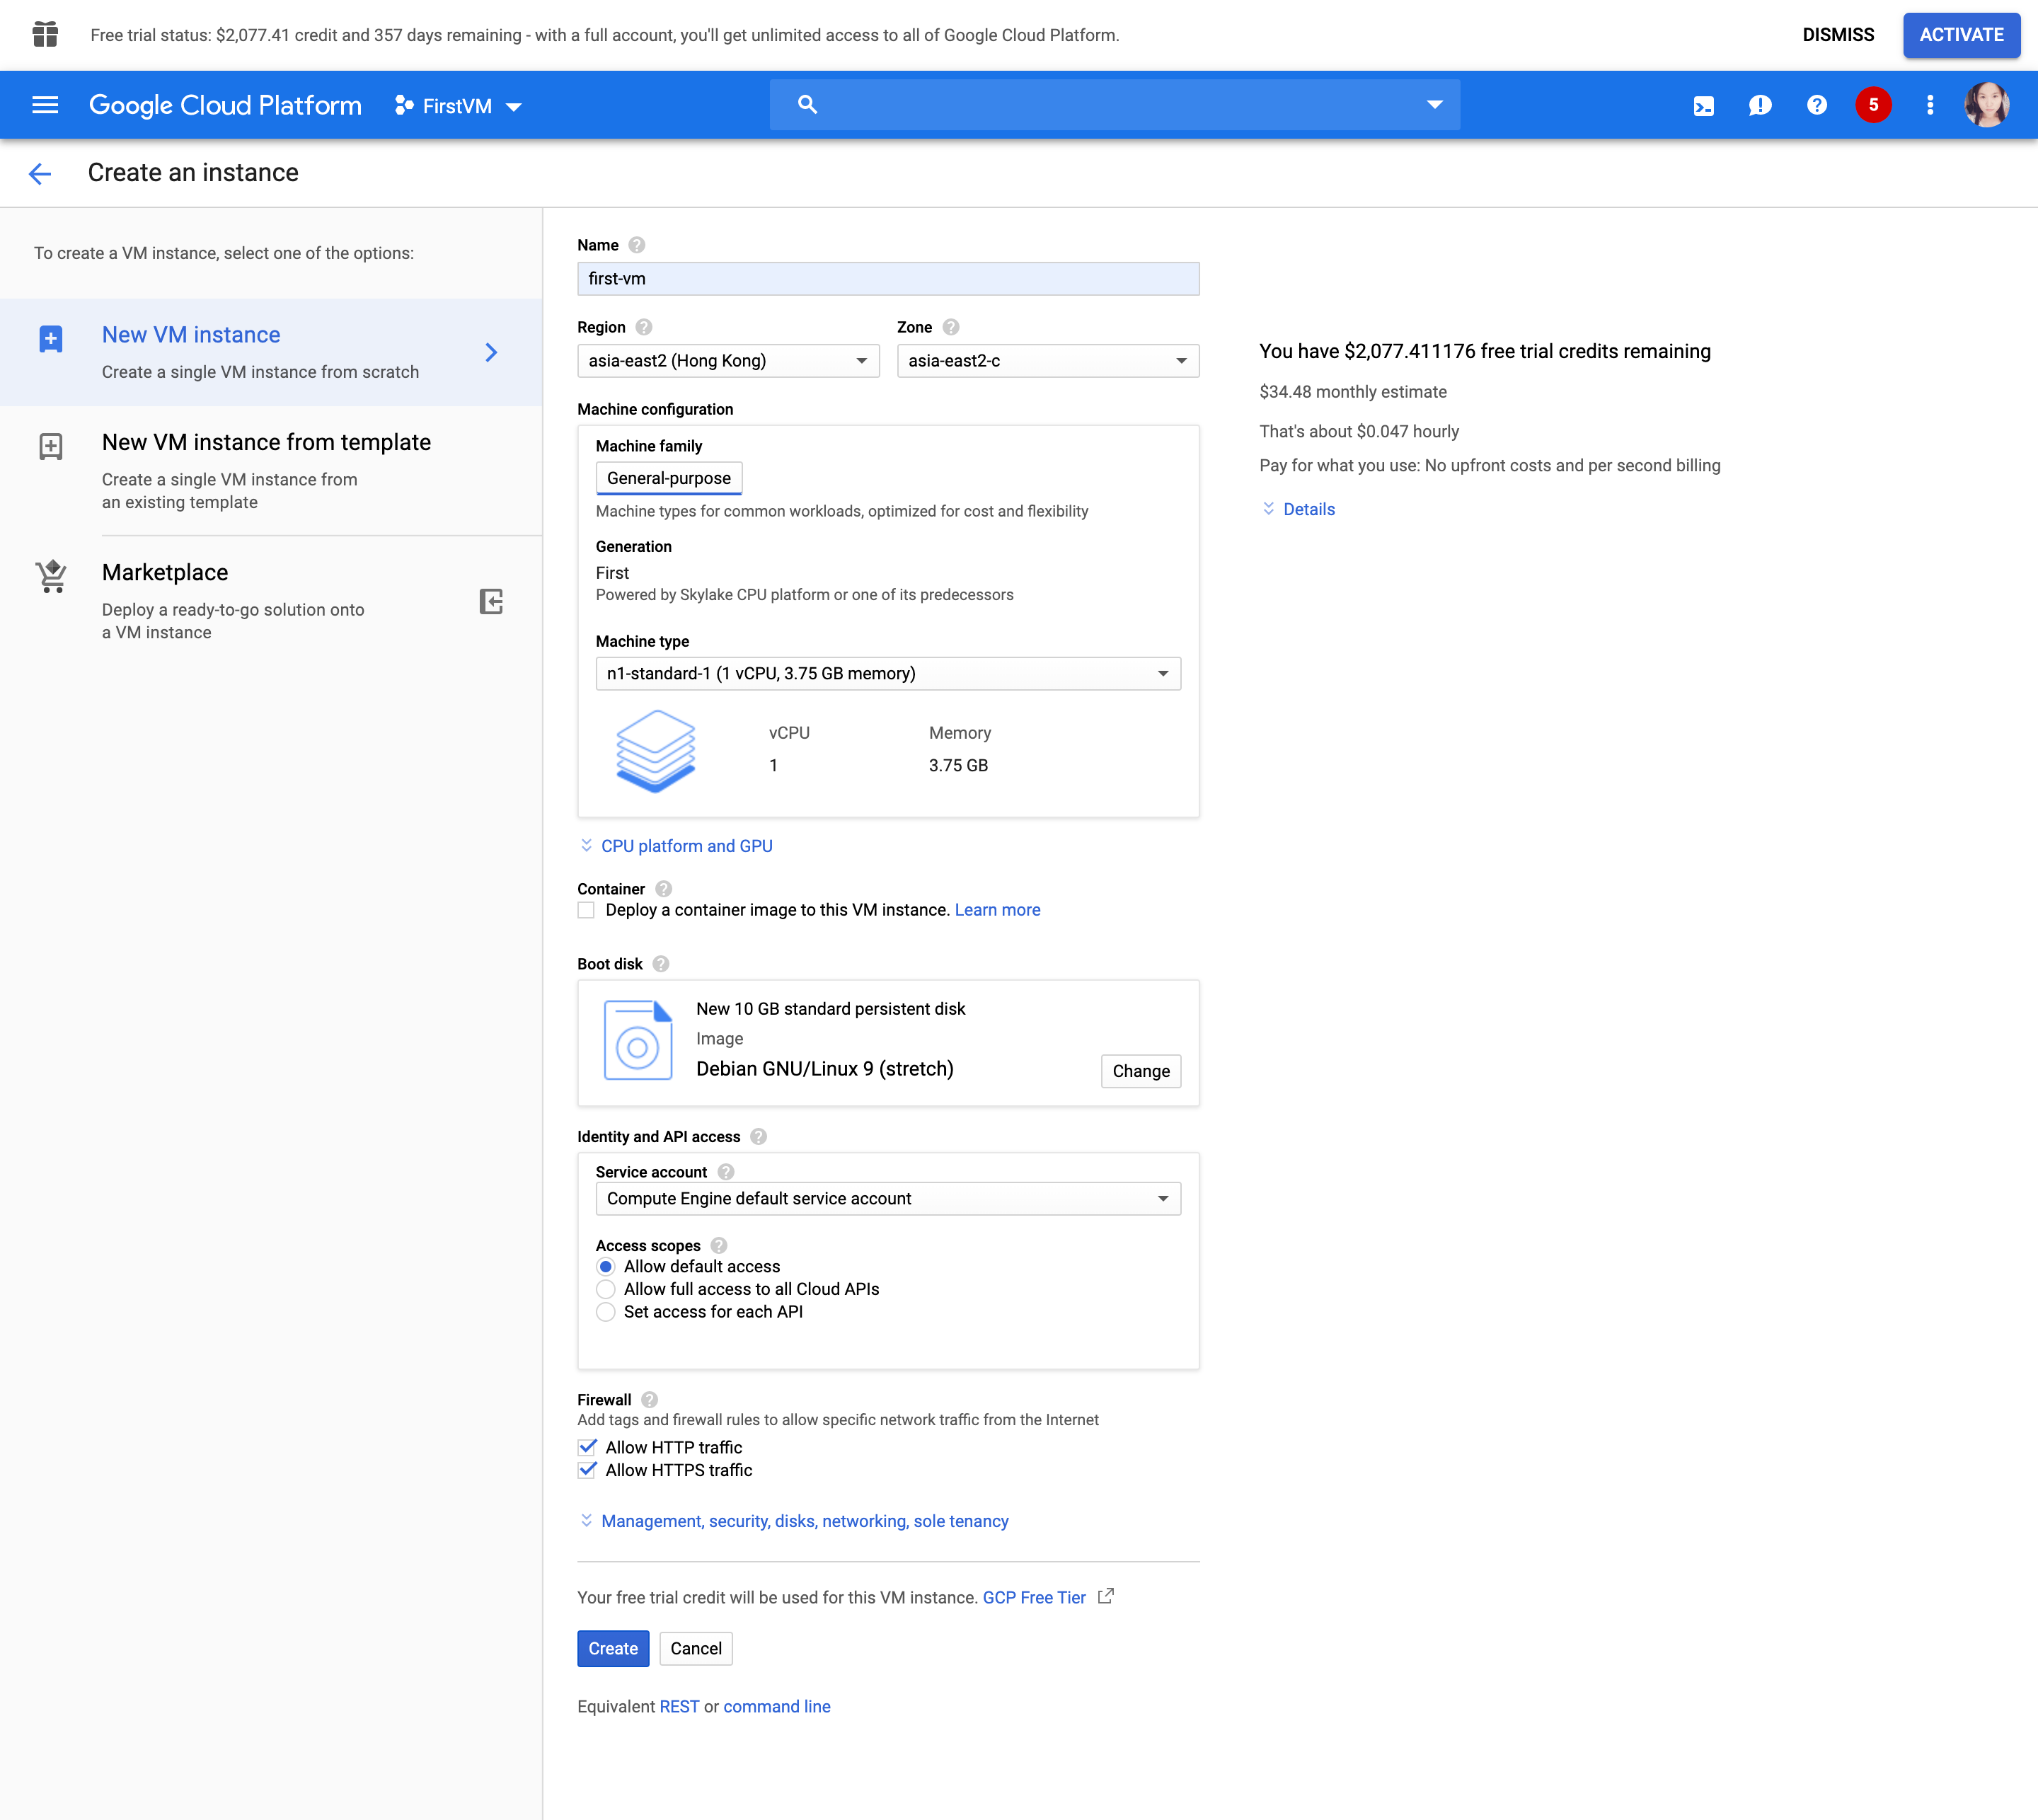
如图填写相关 VM 的基本配置。
-
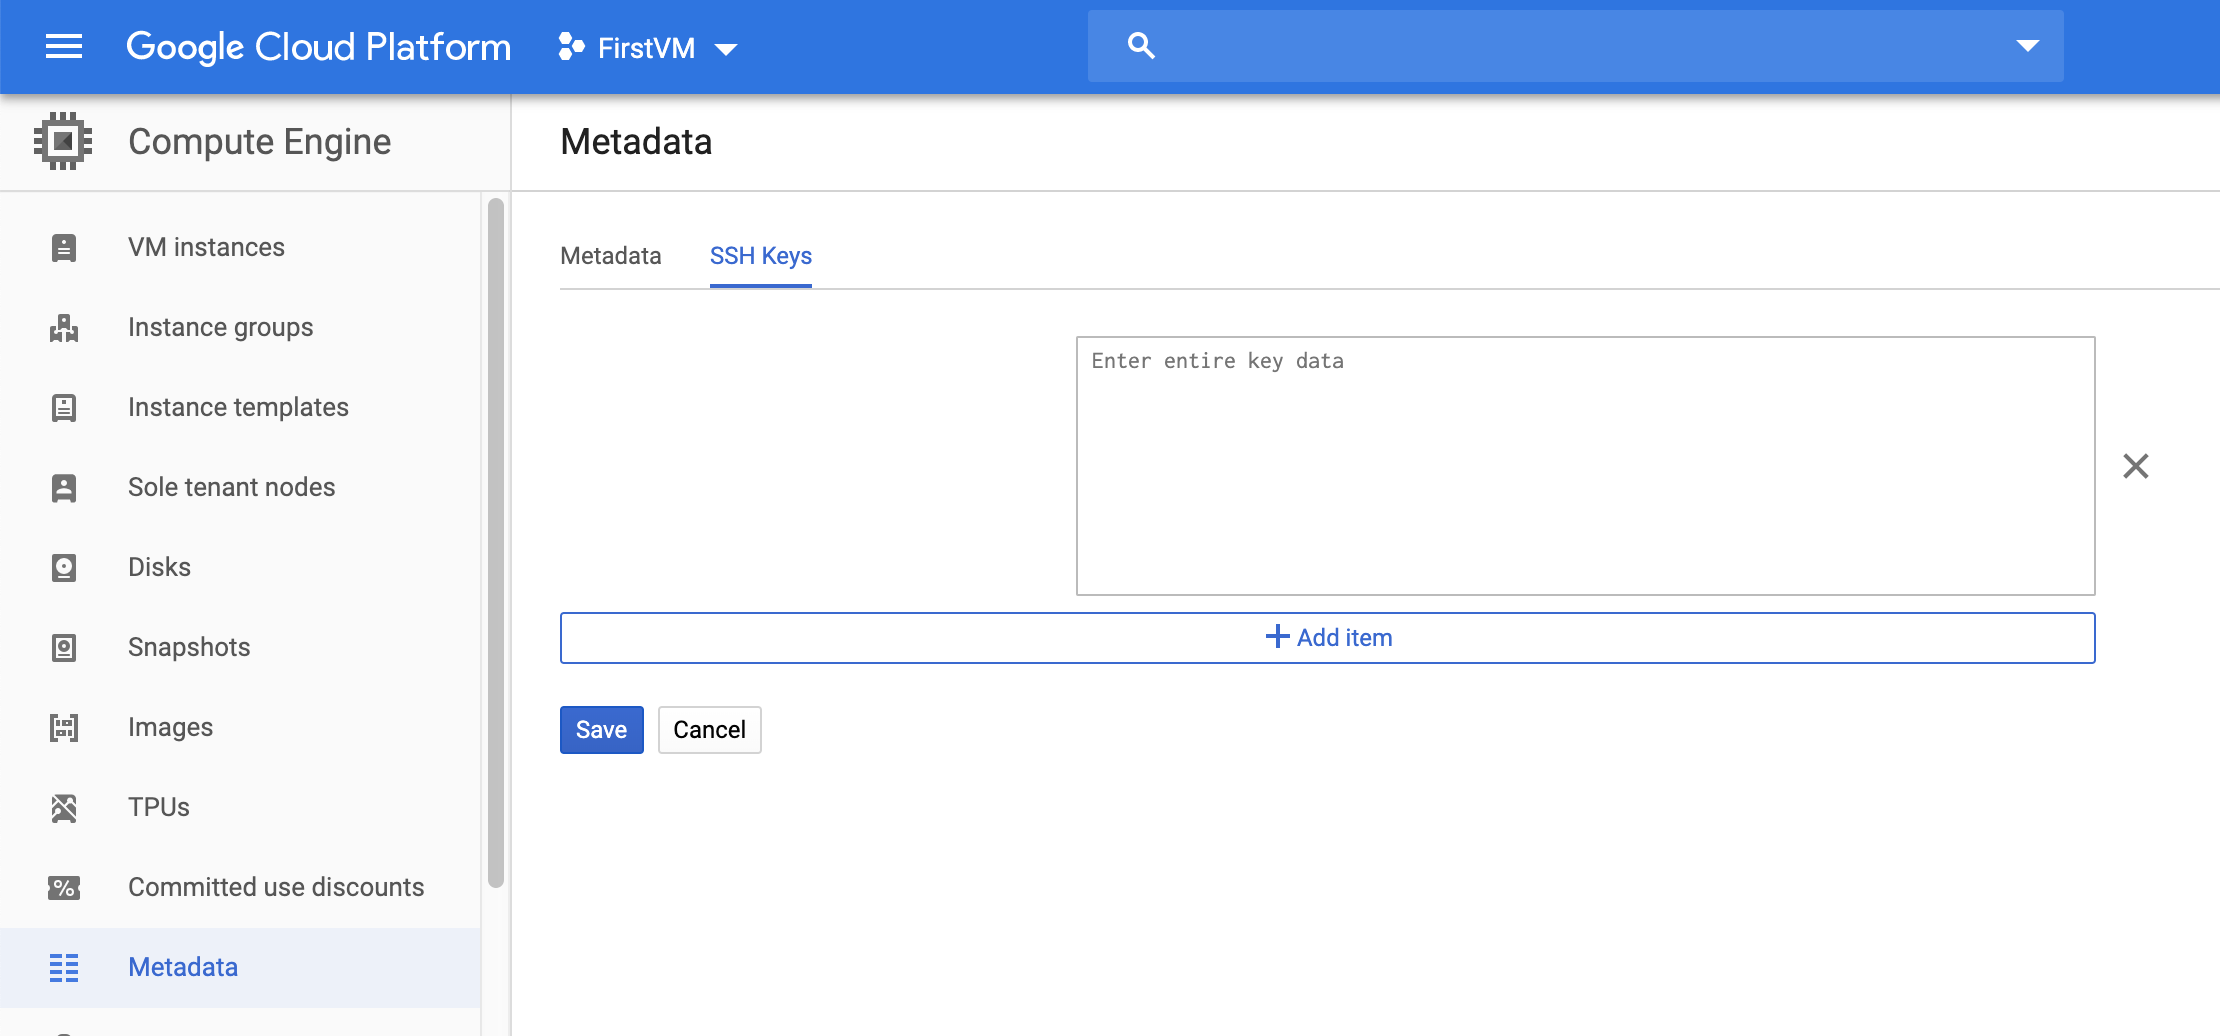
选择菜单栏中的 MetaData。选择 SSH Keys 点击编辑并将本地的公钥粘贴相应输入框中并保存。
-
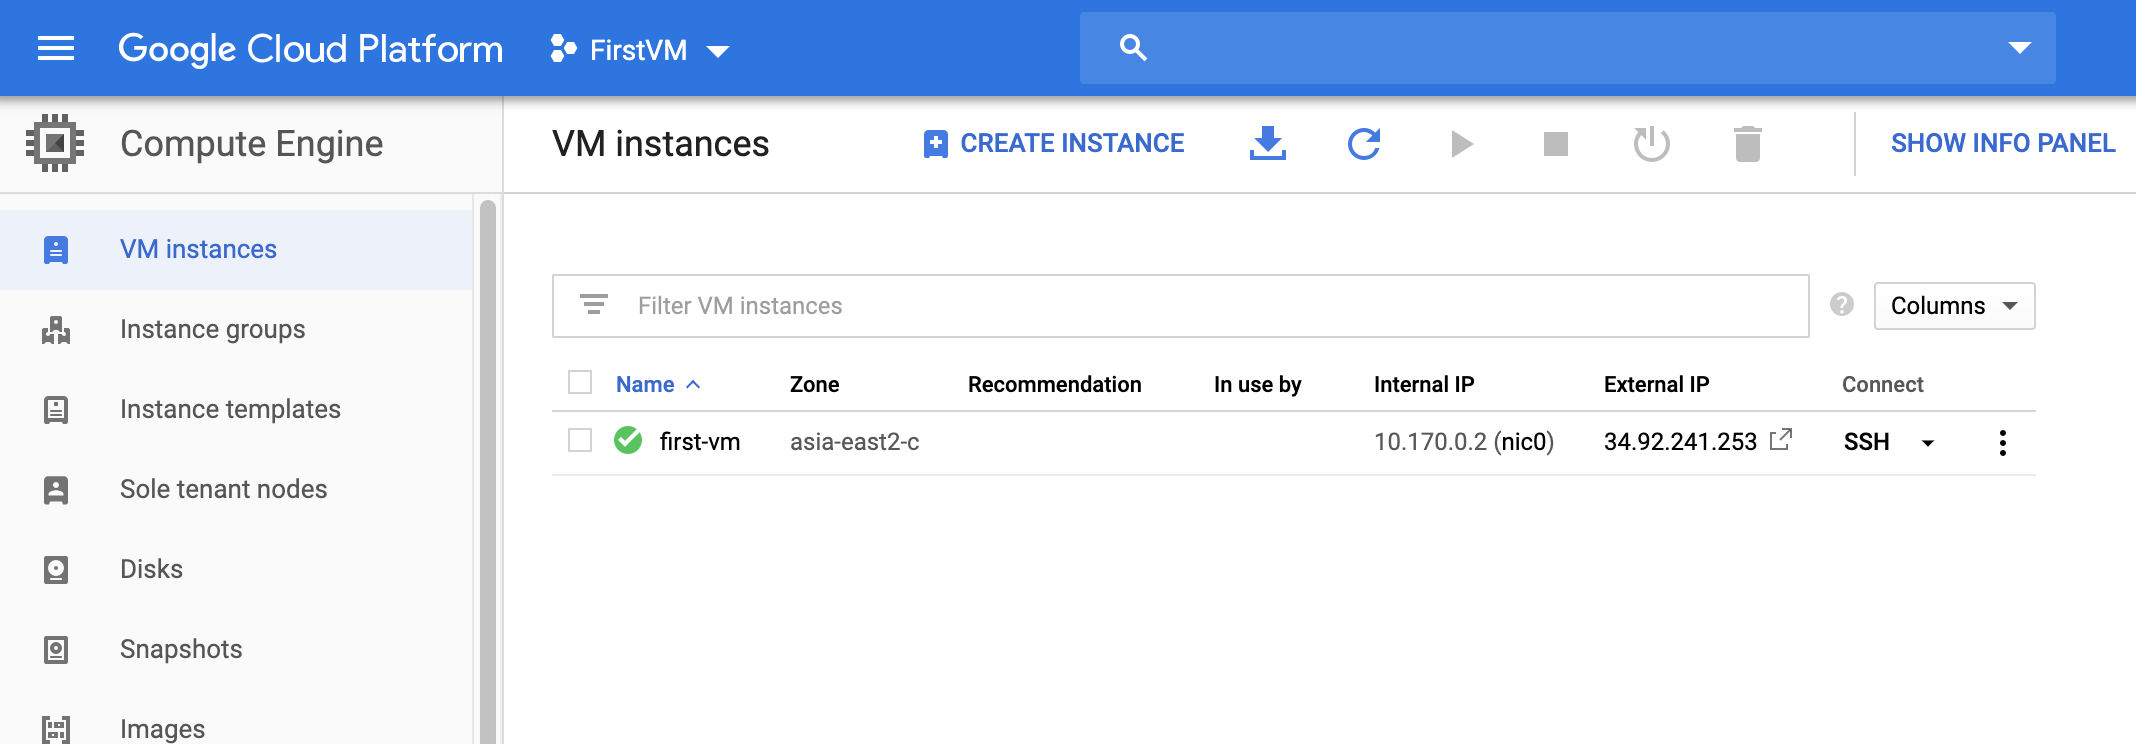
回到 VM Instance 界面就可以看到配置好的服务器了。
-
在终端输入下面的命令行登录 VM
ssh nycode.jn@34.80.135.19 |
部署 Golang
ssh 登录 GCP VM 之后就可以安装服务器软件了。最好在超级用户权限下安装,省事。
安装
- 创建项目目录
mkdir -p go/pkg go/src go/bin |
- 下载安装包
wget -c https://dl.google.com/go/go1.13.linux-amd64.tar.gz |
- 解压安装包
sudo tar -C /usr/local -xzf go1.13.linux-amd64.tar.gz |
设置环境变量
- 打开配置文件
sudo vim /etc/profile |
- 添加路径
export PATH=$PATH:/usr/local/go/bin |
- 生效设置
source /etc/profile |
- 检查安装结果
go version && go env |
Hello World Web Service
写一个简单的 Golang Web 服务
package main |
- 编译运行
root@first-vm-test:~/gopath/src# go build web-service.go |
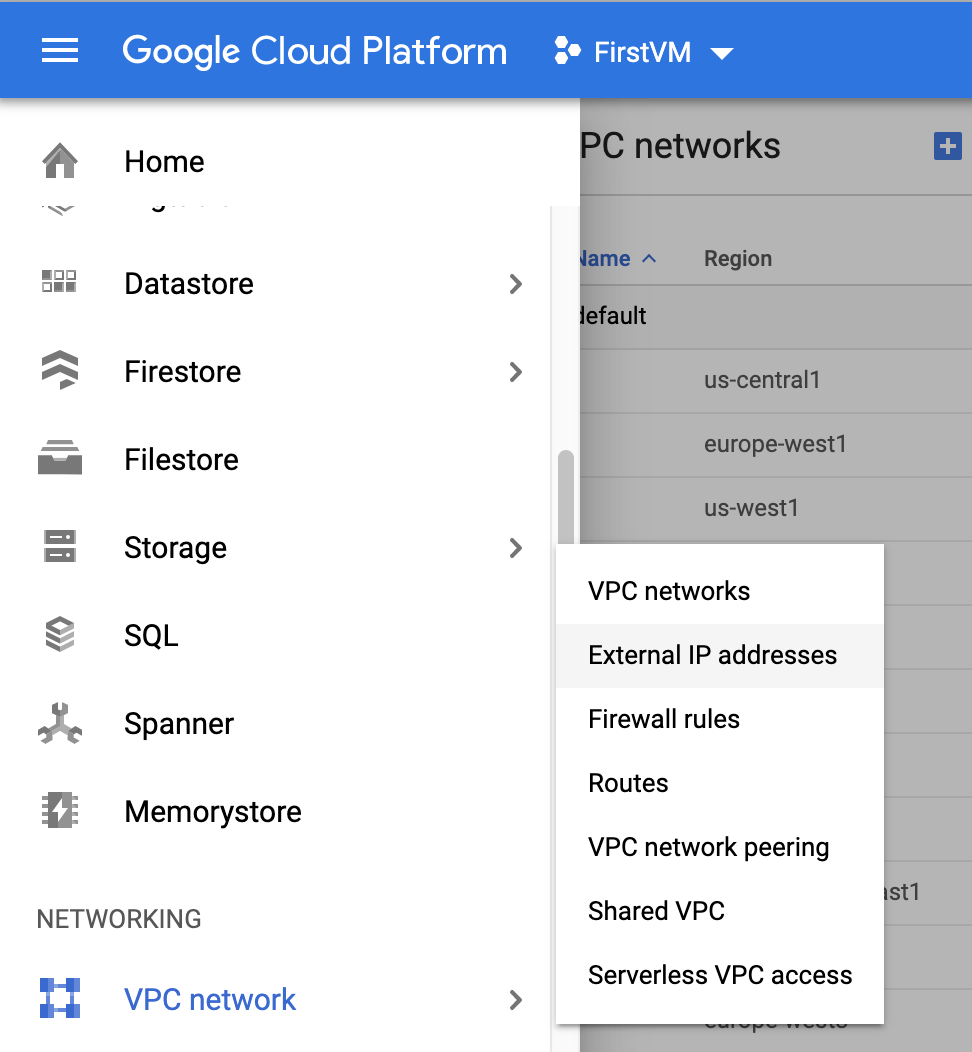
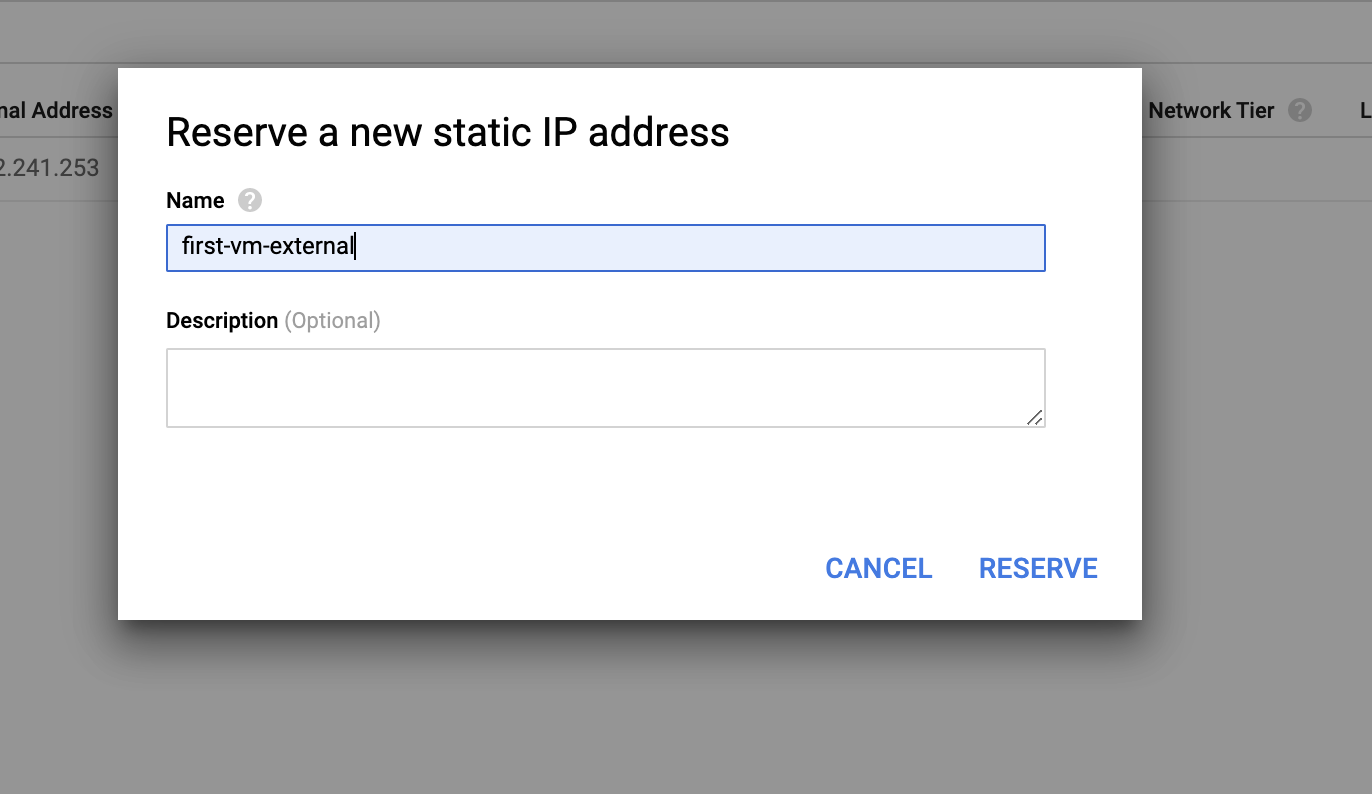
- 选择 VPC Networking - External IP Address 配置静态 IP
为了让外部网络可以访问 VM 的 IP,必须要将临时 IP 设置为静态 IP。

命名 IP 并保存。
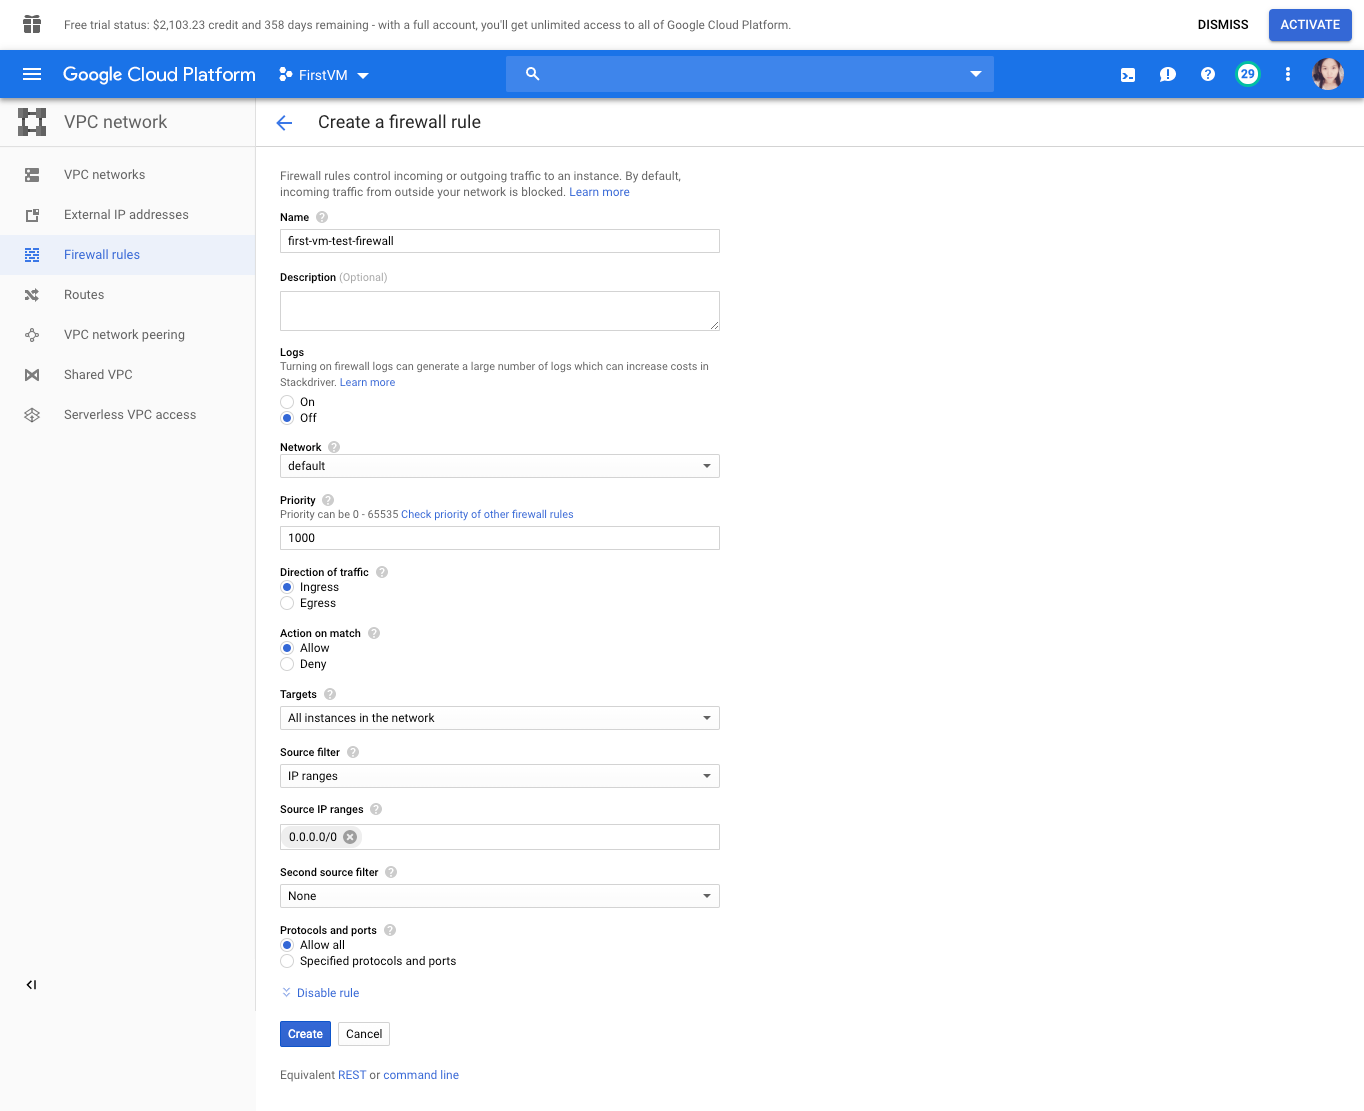
- 配置防火墙
对 firewall 命名,并设置相关规则,规则创建完成如下图所示。
访问 Web 服务
在浏览器输入暴露在外部的静态 IP,例如,本例中的 http://34.80.135.19:1234/
但这样做 Web 服务会存在一个问题,就是退出程序进程,Web 服务就会被关闭了,所以需要安装 supervisor 来使 Go 的进程在后台常驻。
安装 supervisord
- 安装
sudo apt-get install supervisor |
- 创建配置
sudo su |
- 修改配置
[program:golang-http-server] |
- 使用配置
/usr/bin/supervisord -c /etc/supervisord.conf |
- 启用客户端
supervisorctl |
就可看到 golang-http-server 正在运行中,并且退出 terminal 连接也能正常访问 Web 服务。
部署 Nodejs 开发环境
安装 Node
mkdir node |
设置环境变量
export PATH=/home/apps/node/bin/:$PATH |
检查安装
node -v |
部署 Nginx 环境
sudo apt-get install nginx |
访问 VM 的外部 IP,即可看到 Nginx 部署的首页。
部署 Git 环境
安装
sudo apt-get install git |
检查
git --help |
测试项目
git clone https://github.com/niyaoyao/nytoy-websocket-server-with-nodejs.git |
访问 IP:23333/app 页面查看结果。
部署 MySQL 环境
安装
sudo apt-get update |
- 查看版本检查安装结果
mysql -V |
- 初始化安全设置
sudo mysql_secure_installation |
初始化过程中远程 Root 登录的选项,根据个人需求进行设置。
Normally, root should only be allowed to connect from 'localhost'. This |
- 连接 mysql 数据库
sudo mysql -u root -p |
- 重设密码
use mysql |
- 重启 MySQL 服务器
service mysql restart |
如果报错:
-bash: service: command not found |
需要登录 su
sudo su |
- 配置 GCP 的防火墙规则
上文中已经介绍,不做赘述。
远程连接
用 ssh 远程连接 MySQL
mysql -h 354.80.135.19 -u root -p -P 3306 |
如果出现 ERROR 2003 (HY000) 报错,则表明连接出现问题。
Enter password: |
出现连接问题可能有三种原因:
- 网络问题。
- 端口问题。
- 数据库配置问题。
网络问题
ping 34.80.135.19 |
若能够 ping 通,则排除网络问题。
端口问题
远程连接 VM ,登录 su 在 Terminal 输入:
netstat -tunlp | grep mysqld |
查找到 mysqld 的进程,则排除端口问题。
数据库配置问题
数据库的配置问题,网上资料多是修改 /etc/mysql/my.cnf 文件,并将该文件中的 bind_address=127.0.0.1 注释掉,但笔者安装的 MySQL 版本初始化配置是没有这个设置项的。
登录超级用户,打开配置文件。
vim /etc/mysql/my.cnf |
内容如下:
# Import all .cnf files from configuration directory |
所以要一个一个去导入的目录找配置 bind_address=127.0.0.1 的文件。经过一番查找最终在 /etc/mysql/mariadb.conf.d/50-server.cnf 第 29 行找到该配置,并将其注释与保存。
将配置文件修改并保存后,需要重启 MySQL 服务。
service mysql restart |
然后再在本地进行远程连接,就可以直接访问 MySQL 了。
总结
GCP 比较坑的几个点是:
- 必须将外部临时 IP 设置为静态 IP。
- 必须配置防火墙规则以供外部访问相应端口。
- 必须注释 MySQL 的配置 bind address,才能进行远程访问。
参考
- 如何在 Google Compute Engine 上设置 MySQL https://cloud.google.com/solutions/setup-mysql
- MySQL远程访问报错ERROR 2003 https://blog.csdn.net/a5nan/article/details/72864249
- Google 云服务器搭建MySQL数据库并且远程连接 https://cloud.tencent.com/developer/news/228350