盒子
盒子
文章目录
  1. 前言
  2. Cycript 运行时分析
    1. 什么是 Cycript
    2. 安装 Cycript
    3. 玩起来
      1. Mach-O 文件
      2. 导出头文件
      3. 利用 Cycript 进行运行时分析
      4. Cycript 其他姿势
  3. 小结
  4. 参考资料

今天开始学逆向:用 Cycript 进行运行时分析及应用操作

前言

上一篇文章已经学习了使用 SSH 连接越狱设备,以及利用 Clutch, class-dump 等工具进行砸壳和导出头文件的操作。
本篇文章会在上一篇文章的基础上再一点运行时的分析,所以,需要先复习一下功课啦。

Cycript 运行时分析

Cycript 官网

什么是 Cycript

Cycript 糅合了 ES6, Objective-C++ 与 Java 等语法风格的脚本语言,是作为一个 Cycript-to-JavaScript 编译器的实现,并且使用了(未修改)的 JavaScript 内核作为其虚拟机。Cycript 主要被用于 iOS 的逆向工程。
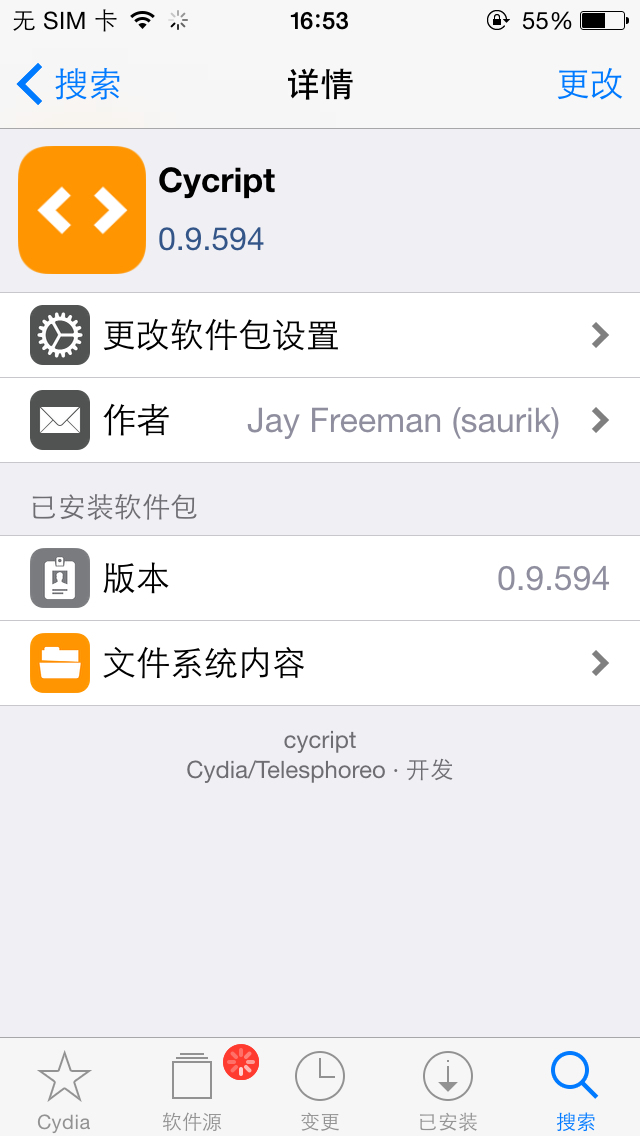
安装 Cycript

越狱设备安装 Cycript 可以在官网下载 SDK,然后再推送到越狱设备上。但比较方便的方法是在 Cydia 里搜索并下载。

玩起来

上一篇说到从 App Store 下载应用都是经过签名加密的,并且利用 Clutch 砸壳得到解密后的 ipa 包,那这次试一下在助手市场下载应用进行头文件导出的操作。
以美图秀秀为例,在助手市场下载之后进入应用存储目录,查找美图秀秀存储的目录。

iOS 常用的文件目录:

  • home ~ 目录 /var/root
  • 应用存储目录 /var/mobile/Containers/Bundle/Application
  • 照片存储目录 /private/var/mobile/Media/DCIM
  • 命令存储目录 /usr/bin

进入 /var/mobile/Containers/Bundle/Application 目录,ls 子目录,找到美图秀秀的存储位置。

NY:/var/mobile/Containers/Bundle/Application root# ls 8D71E631-48D6-4FE6-A8BE-5394AD898DD7/
MTXX.app/ iTunesMetadata.plist

Mach-O 文件

直接进入 MTXX.app 目录下,将二进制可执行文件 MTXX 直接 scp 推到 Mac 上。
在 OS X 和 iOS 操作系统下的二进制可执行文件为 Mach-O 文件,可以利用 otool 命令查看。

  • 查看 Mach-O 头
➜  Reverse otool -h MTXX
Mach header
magic cputype cpusubtype caps filetype ncmds sizeofcmds flags
0xfeedface 12 9 0x00 2 61 6368 0x00218085
Mach header
magic cputype cpusubtype caps filetype ncmds sizeofcmds flags
0xfeedfacf 16777228 0 0x00 2 61 7104 0x00218085

Mach-O 为 Mach Object 文件格式的缩写,它是一种用于可执行文件,目标代码,动态库,内核转储的文件格式。作为a.out格式的替代,Mach-O 提供了更强的扩展性,并提升了符号表中信息的访问速度。

一个 Mach-O 文件包含三个最主要的部分:

  • 在每个 Mach-O 文件的开头是 Header ,用来标识这个文件是 Mach-O 文件。 Header 也包含其他基础文件类型的信息,比如,目标架构,以及那些影响该文件的剩余部分的一些特定选项的标志。
    紧接 Header 之后的是 Load commands ,一系列不定长的加载命令。这些加载命令具体说明了 Mach-O 文件的布局和联系特征。
  • 在 Load commands 之后,是 Data 。Data 包涵一个或多个 segment ,每个 segment 包含零个或多个 section 。每个 section 包含代码或特定类型的数据。每个 segment 定义了一个虚拟内存地址偏移量的区域,从而,动态链接将其映射到进程的地址空间。
  • 在用户级全链接的 Mach-O 文件中,最后一个 segment 是 link edit (链接器)段。这个段包含了链接器信息表,比如,符号表、字符串表等,被动态链接器链接到它所依赖的库的一个可执行文件或 Mach-O 文件的 bundle。
    得到 Mach-O

  • 查看 Segment 和 Section

可以利用 size 查看 Mach-O 文件的 Segment 和 Section

size -l -x -m MTXX

  • 查看符号表及对应的动态链接库

利用 nm 命令查看 Mach-O 的符号名

nm -nm MTXX

以上命令的输出比较多,就不复制粘贴了。

导出头文件

结合上一篇文章的内容,导出头文件

class-dump MTXX > MTXX.h

利用 Cycript 进行运行时分析

  • 获得进程 PID

在越狱设备中开启美图秀秀,并切回到越狱设备的终端,找到美图秀秀的进程编号 PID。

NY:~ root# ps aux | grep "MTXX"
mobile 949 3.9 3.3 737672 34540 ?? Ss 6:28PM 0:03.82 /var/mobile/Containers/Bundle/Application/8D71E631-48D6-4FE6-A8BE-5394AD898DD7/MTXX.app/MTXX
root 956 3.3 0.0 536256 456 s000 R+ 6:28PM 0:00.01 grep MTXX

找到 mobile 对应的 PID 949,之后利用 Cycript 进行运行时分析

  • 使用 Cycript
NY:~ root# cycript -help
cycript: invalid option -- h
usage: cycript [-c] [-p <pid|name>] [-r <host:port>] [<script> [<arg>...]]
NY:~ root# cycript -p 949

可以知道只要加上 -p 选项即可进入 Cycript 的运行状态。
Cycript 换行不太方便,直接输入回车键会立即执行脚本。所以,我采用多个空格来实现换行。

  • 美图秀秀运行时分析

结合已经得到的头文件,找到头文件中的类以及该类对应的方法,尝试使用 Cycript 执行这些方法。

cy# var delegate = UIApp.delegate
cy# var window = delegate.window
#"<UIWindow: 0x14e64a00; frame = (0 0; 320 568); autoresize = W+H; gestureRecognizers = <NSArray: 0x14e64ed0>; layer = <UIWindowLayer: 0x14e63ab0>>"
cy# var rootViewController = window.rootViewController
#"<UINavigationController: 0x14e5fff0>"
cy# var childVC = rootViewController.childViewControllers
@[#"<HomeViewController: 0x14d8c3e0>"]
cy# var homeVC = [childVC firstObject]
#"<HomeViewController: 0x14d8c3e0>"
cy# [homeVC pullDownToCamera]
cy# [[[UIAlertView alloc] initWithTitle:@"Cycript Test" message:@"Runtime Modify" delegate:ni cancelButtonTitle:@"Done" otherButtonTitles:nil, nil] show]

在 App 的运行时,我们可以执行已有的方法,比如,在窗口上弹出一个 UIAlertView 。
再比如,从 MTXX.h 中查找到 HomeViewController 有 pullDownToCamera 的实例方法。当调用 pullDownToCamera 方法时,手机屏幕就会弹出照相机的界面。
因此,通过调用导出的头文件中方法,并根据应用运行时的表现,就可以大概想象出应用的基本结构。

Cycript 其他姿势

  • 应用代理

在 Cycript 中 UIApp 与 [UIApplication sharedApplication] 作用相同

NY:~ root# cycript -p SpringBoard
cy# UIApp
#"<SpringBoard: 0x148aa400>"
cy# [UIApplication sharedApplication]
#"<SpringBoard: 0x148aa400>"

  • 创建一个新的实例
var delegate = new Instance(0x148aa400)
  • 获得对象的 ivar

ivar(instance variable) 即对象的实例变量,以上面的 delegate 为例,delegate 的实例变量为

cy# var delegate = new Instance(0x148aa400)
#"<SpringBoard: 0x148aa400>"
cy# *delegate
{isa:SpringBoard,_delegate:#"<SpringBoard: 0x148aa400>",_exclusiveTouchWindows:[NSSet setWithArray:@[]]],_event:#"<UIInternalEvent: 0x145aeff0>",_touchesEvent:#"<UITouchesEvent: 0x145af0f0> timestamp: 0 touches: {(\n)}",_motionEvent:#"<UIMotionEvent: 0x145952b0> timestamp: 0 subtype: 0",_remoteControlEvent:#"<UIRemoteControlEvent: 0x146ab470>",_remoteControlEventObservers:0,_topLevelNibObjects:null,_networkResourcesCurrentlyLoadingCount:0,_hideNetworkActivityIndicatorTimer:null,_editAlertView:null,_statusBar:#"<UIStatusBar: 0x148c0800; frame = (0 0; 320 24); opaque = NO; autoresize = W+BM; userInteractionEnabled = NO; layer = <CALayer: 0x145a78d0>>",_statusBarRequestedStyle:306,_statusBarWindow:#"<UIStatusBarWindow: 0x146f51f0; frame = (0 0; 320 568); opaque = NO; gestureRecognizers = <NSArray: 0x146a63c0>; layer = <UIWindowLayer: 0x146eabe0>>",_observerBlocks:@[],_postCommitActions:@[],_mainStoryboardName:null,_tintViewDurationStack:@[],_statusBarTintColorLockingControllers:null,_statusBarTintColorLockingCount:0,_preferredContentSizeCategory:null,_applicationFlags:@error,_defaultTopNavBarTintColor:null,_undoButtonIndex:0,_redoButtonIndex:0,_moveEvent:#"<UIMoveEvent: 0x146d9590>",_physicalButtonsEvent:#"<UIPhysicalButtonsEvent: 0x146b1240>",_wheelEvent:#"<UIWheelEvent: 0x146e0600>",_physicalButtonMap:@{101:#"<_UIPhysicalButton: 0x15c89a10>",104:#"<_UIPhysicalButton: 0x147d0280>"},_physicalKeyboardEvent:#"<UIPhysicalKeyboardEvent: 0x146a7570>",_alwaysHitTestsForMainScreen:0,_backgroundHitTestWindow:null,_eventQueue:@[],_childEventMap:&{},_disableTouchCoalescingCount:0,_classicMode:0,_actionsPendingInitialization:null,_idleTimerDisabledReasons:@error,_currentTimestampWhenFirstTouchCameDown:0,_currentLocationWhereFirstTouchCameDown:{x:0,y:0},_currentActivityUUID:null,_currentActivityType:null,_sceneSettingsDiffInspector:#"<UIApplicationSceneSettingsDiffInspector:0x1459ef50> -> <BSMutableSettings:0x14572e70> -> {\n\t(7) = <BSMutableSettings:0x1459f7b0> -> {\n\t(2) = (\n \"<__NSMallocBlock__: 0x145a5b90>\"\n)\n}\

即,获得对象的实例变量方法是,直接输入 <*对象名> 。

  • 打印对象方法

如下代码所示,第一个参数是类名

function printMethods(className, isa) {
var count = new new Type("I");
var classObj = (isa != undefined) ? objc_getClass(className)->isa : objc_getClass(className);
var methods = class_copyMethodList(classObj, count);
var methodsArray = [];
for(var i = 0; i < *count; i++) {
var method = methods[i];
methodsArray.push({selector:method_getName(method), implementation:method_getImplementation(method)});
}
free(methods);
return methodsArray;
}

用法如下

cy# printMethods("NSRunLoop", true)
[{selector:@selector(_mapkit_networkIORunLoop),implementation:&(extern "C" id 629301593(id, SEL, ...))},{selector:@selector(set_mapkit_networkIORunLoop:),implementation:&(extern "C" id 629301645(id, SEL, ...))},{selector:@selector(_new:),implementation:&(extern "C" id 617824525(id, SEL, ...))},{selector:@selector(currentRunLoop),implementation:&(extern "C" id 617612889(id, SEL, ...))},{selector:@selector(mainRunLoop),implementation:&(extern "C" id 617895681(id, SEL, ...))}]

  • Hook 方法

系统默认的 currentRunLoop 会返回 CFRunLoop 实例的详细描述,如下所示。

cy# [NSRunLoop currentRunLoop]
#"<CFRunLoop 0x14698f50 [0x321be700]>{wakeup port = 0x1403, stopped = false, ignoreWakeUps = false, \ncurrent mode = kCFRunLoopDefaultMode,\ncommon modes = <CFBasicHash 0x14698fd0 [0x321be700]>{type = mutable set, count = 2,\nentries =>\n\t0 : <CFString 0x326dc838 [0x321be700]>{contents = \"UITrackingRunLoopMode\"}\n\t1 : <CFString 0x321a4cc8 [0x321be700]>{contents = \"kCFRunLoopDefaultMode\"}\n}\n,\ncommon mode items = <CFBasicHash 0x14699410 [0x321be700]>{type = mutable set, count = 65,\nentries =>\n\t0 : <CFRunLoopSource 0x145addf0 [0x321be700]>{signalled = No, valid = Yes, order = -1, context = <CFRunLoopSource context>{version = 0, info = 0x0, callout = <redacted> (0x2b3ce001)}}\n\t1 : <CFRunLoopSource 0x1459f330 [0x321be700]>{signalled = No, valid = Yes, order = 0, context = <CFRunLoopSource context>{version = 0, info = 0x0, callout = <redacted> (0x2a84fee9)}}\n\t2 : <CFRunLoopSource 0x1464db60 [0x321be700]>{signalled = No, valid = Yes, order = 0, context = <CFRunLoopSource context>{version = 0, info = 0x0, callout = ??? (0x2b74bb79)}}\n\t3 : <CFRunLoopObserver 0x145a41f0 [0x321be700]>{valid = Yes, activities = 0xa0, repeats = Yes, order = 2147483647, callout = <redacted> (0x27577875), context = <CFArray 0x145a4170 [0x321be700]>{type = mutable-small, count = 1, values = (\n\t0 : <0x734028>\n)}}\n\t4 : <CFRunLoopSource 0x158dd350 [0x321be700]>{signalled = No, valid = Yes, order = 0, context = <CFRunLoopSource MIG Server> {port = 103255, subsystem = 0x4b3f30, context = 0x0}}\n\t5 : <CFRunLoopSource 0x146571f0 [0x321be700]>{signalled = No, valid = Yes, order = 0, context = <CFMachPort 0x14657060 [0x321be700]>{valid = Yes, port = 8003, source = 0x146571f0, callout = <redacted> (0x25a979e1), context = <CFMachPort context 0x0>}}\n\t6 : <CFRunLoopSource 0x146f38c0 [0x321be700]>{signalled = No, valid = Yes, order = 0, context = <CFMachPort 0x146f91f0 [0x321be700]>{valid = Yes, port = 1331b, source = 0x146f38c0, callout = <redacted> (0x2beb16e9), context = <CFMachPort context 0x158d4370>}}\n\t7 : <CFRunLoopTimer 0

将原来方法替换掉

cy# original_NSRunLoop_description = NSRunLoop.prototype['description'];
(extern "C" id ":description"(id, SEL))
cy# NSRunLoop.prototype['description'] = function() { return original_NSRunLoop_description.call(this).toString().substr(0,0) + "This is a replaced description "; }
function () {var e;e=this;return original_NSRunLoop_description.call(e).toString().substr(0,0)+"This is a replaced descripttion ";}

原来的 description 方法被替换为新的描述字符串,再执行方法则会有如下输出。

cy# [NSRunLoop currentRunLoop]
#"This is a replaced descripttion "

  • 打印视图层级关系

递归打印视图层级关系

cy# UIApp.keyWindow.recursiveDescription().toString()
`<_UIAlertControllerShimPresenterWindow: 0x182adce0; frame = (0 0; 320 568); opaque = NO; gestureRecognizers = <NSArray: 0x1826d250>; layer = <UIWindowLayer: 0x18232af0>>
| <UITransitionView: 0x180f3150; frame = (0 0; 320 568); clipsToBounds = YES; autoresize = H; layer = <CALayer: 0x180c1650>>
| | <UIView: 0x16f292f0; frame = (0 0; 320 568); autoresize = W+H; layer = <CALayer: 0x1816e2c0>>
| | <_UIAlertControllerView: 0x1816f9e0; frame = (0 0; 320 568); autoresize = W+H; layer = <CALayer: 0x16f7bb90>>
| | | <UIView: 0x16f17f90; frame = (0 0; 320 568); gestureRecognizers = <NSArray: 0x181b9780>; layer = <CALayer: 0x16f12b80>>
| | | <UIView: 0x182a6720; frame = (25 235; 270 98); animations = { <_UIParallaxMotionEffect: 0x16d2f520>=<CAAnimationGroup: 0x1821c430>; }; layer = <CALayer: 0x182b02b0>>
| | | | <_UIDimmingKnockoutBackdropView: 0x16f36a30; frame = (0 0; 270 98); clipsToBounds = YES; layer = <CALayer: 0x16f7aaf0>>
| | | | | <UIView: 0x16f51130; frame = (0 0; 270 98); clipsToBounds = YES; layer = <CALayer: 0x16fe2bd0>>
| | | | | <_UIBackdropView: 0x181925f0; frame = (0 0; 270 98); clipsToBounds = YES; opaque = NO; autoresize = W+H; userInteractionEnabled = NO; layer = <_UIBackdropViewLayer: 0x16f807e0>>
| | | | | | <_UIBackdropEffectView: 0x16f53e00; frame = (0 0; 270 98); clipsToBounds = YES; opaque = NO; autoresize = W+H; userInteractionEnabled = NO; layer = <CABackdropLayer: 0x183447d0>>
| | | | | | <UIView: 0x16f1f450; frame = (0 0; 270 98); hidden = YES; opaque = NO; autoresize = W+H; userInteractionEnabled = NO; layer = <CALayer: 0x183e9af0>>
| | | | <UIView: 0x16f58920; frame = (0 0; 270 98); layer = <CALayer: 0x16f7bbc0>>
| | | | | <UIView: 0x181766f0; frame = (0 0; 270 98); clipsToBounds = YES; layer = <CALayer: 0x16d023f0>>
| | | | | | <_UIAlertControllerShadowedScrollView: 0x181f9940; frame = (0 0; 270 54); clipsToBounds = YES; gestureRecogni

小结

  • 学习的目标规划
    开端两篇文章主要学习了几个常用工具的使用,也就是方法论。然而,只懂得使用工具,是不足以学会逆向的,所以后面学习完 IDA 的使用之后,就会整理一篇理论的文章。

  • class-dump
    对于某些 Swift 混编的项目,会造成 crash 的报错。比如在对天猫应用进行导出头文件的时候,就报如下错误。

➜  Reverse class-dump Tmall4iPhone > Tmall4iPhone.h
2016-11-07 18:37:16.748 class-dump[6940:282221] Error: Cannot find offset for address 0x280000000103077b in stringAtAddress:

可以继续关注原作者会否进行适配,毕竟 Swift 是发展的趋势。

  • 正向开发和逆向开发的核心
    从这次学习过程中,我们可以发现,逆向工程和正向工程的区别,就是二进制文件 Mach-O 文件获得方式的区别。正向开发时,是先编写程序,然后编译、链接、签名、打包最终生成含有应用 Mach-O 的包文件。而逆向开发,则是相反,首先是要先获得 Mach-O 文件,再根据二进制文件得到相应的代码,进行分析,修改等操作。

参考资料

支持一下
扫一扫,支持forsigner
  • 微信扫一扫
  • 支付宝扫一扫